You can create relationships between list-type custom attributes that are used on service request forms, so that the value selected for one custom attribute affects the selectable values for one or more other custom attributes. These relationships allow you to prevent requesters from making invalid form choices.
The following example demonstrate how you can use related custom attributes to get requesters to specify the machine role, either database server or web server. If they choose database server, the form could prompt them to choose a database application (Microsoft SQL or Postgres). If they choose Postgres, the form would prompt them to choose from available Postgres versions.
The steps required to configure this example are:
- Create a list custom attribute called Machine Role
- Create a sublist attribute called Application
- Create a sublist attribute called Application Version
- Add the custom attributes to the service catalog blueprint
- Test the service request form
- The relationship between two attributes is visible only on new service request forms and service change request forms. Selectable values aren't filtered for sublist attributes when applying custom attributes to services in other ways, such as applying values directly in Commander or the Service Portal, or through workflows.
- When the parent attribute is a placement attribute, all of its sublist attributes are also placement attributes. Likewise, when the parent attribute is a custom attribute, all of its sublist attributes are custom attributes (that is, they don't affect placement). If a custom attribute is changed into a placement attribute, all of its sublist attributes are also changed into placement attributes. If a placement attribute is changed into a custom attribute, all of its sublist attributes are also changed into custom attributes.
Create a list custom attribute called Machine Role
Access: | Configuration > Custom Attributes |
Available to: | Commander Roles of Superuser and Enterprise Admin |
- On the Custom Attributes page, click Add.
- In the Configure Attribute dialog, enter "Machine Role" for the name.
- For Type, select List.
- From Applies To, select Form to create a custom attribute to capture information required only during the service request process, then click Next.
- Form attributes aren't attached to deployed services.
- If you apply the custom attribute to All Types, which includes forms, the relationship between attributes is visible only on request forms.
- On the Configure Attribute page, enter a comma-separated list of values that users can select and click Add.
The maximum number of characters for each value is 100. For this example, type "Database Server,Web Server".
- Click Finish.
Create a sublist attribute called Application
Access: | Configuration > Custom Attributes |
Available to: | Commander Roles of Superuser and Enterprise Admin |
- On the Custom Attributes page, click Add.
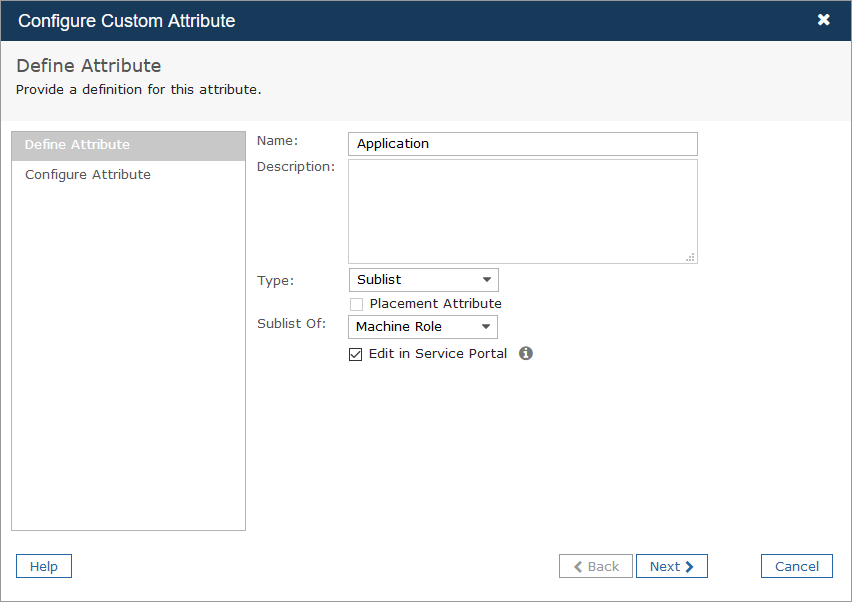
- In the Configure Attribute dialog, enter "Application" for the name.
- From Type, select Sublist.
- From Sublist Of, select Machine Role, then click Next.
This option makes Application a child attribute of Machine Role.
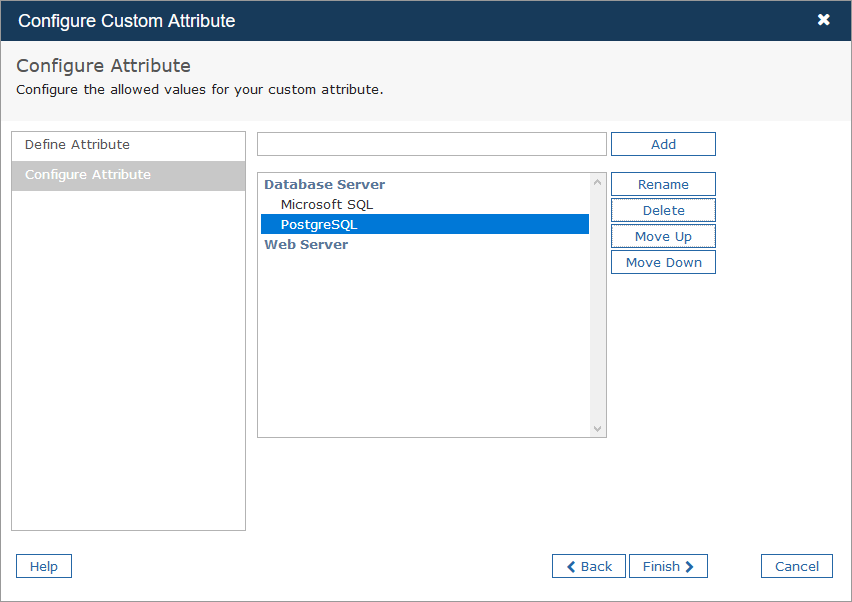
- On the Configure Attribute page, for each value of the parent attribute, enter a comma-separated list of allowed values:
- Click a value in the list and enter values in the text field, then click Add.
- Click another value in the list and enter values for it, and click Add.
- You can also use the Move Up and Move Down buttons to arrange the allowed values in the tree.
The image below shows the two server types added for Database Server, but no values are added for Web Server.
- Click Finish.
Create a sublist attribute called Application Version
Now we'll create another level of relationship.
Access: | Configuration > Custom Attributes |
Available to: | Commander Roles of Superuser and Enterprise Admin |
- On the Custom Attributes page, click Add.
- In the Configure Attribute dialog, enter "Application Version" for the name.
- From Type, select Sublist.
- From Sublist Of, select Application, then click Next.
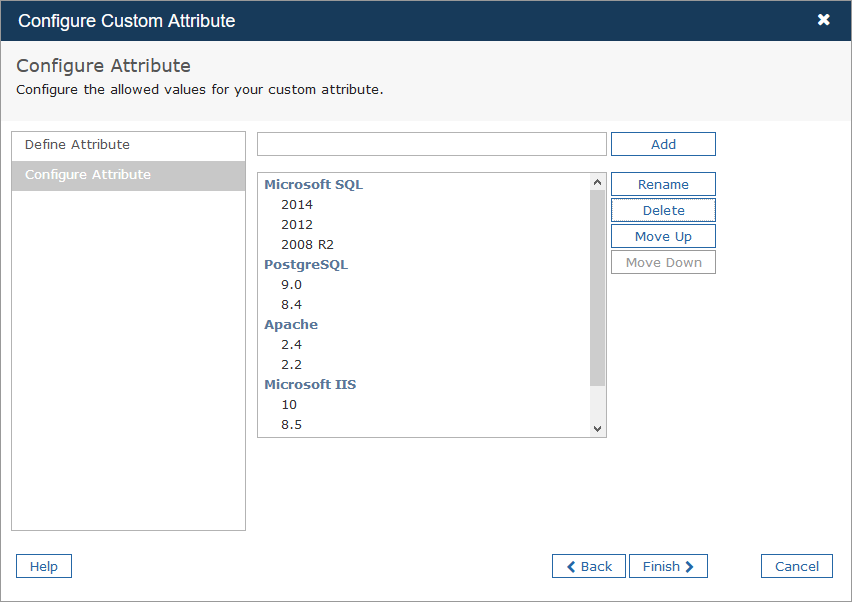
- On the Configure Attribute page, for each application, enter available versions as shown below.
- Click Finish.
Add the custom attributes to the service catalog blueprint
To make these custom attributes available for a new service request, add them to the service catalog blueprint, as explained here.
You can also add the custom attributes to service-level form for a service request or a change request, see Create New Service Requests.
Access: | Configuration > Custom Attributes |
Available to: | Commander Roles of Superuser and Enterprise Admin |
To add custom attributes to the service catalog blueprint:
- Edit a service catalog entry.
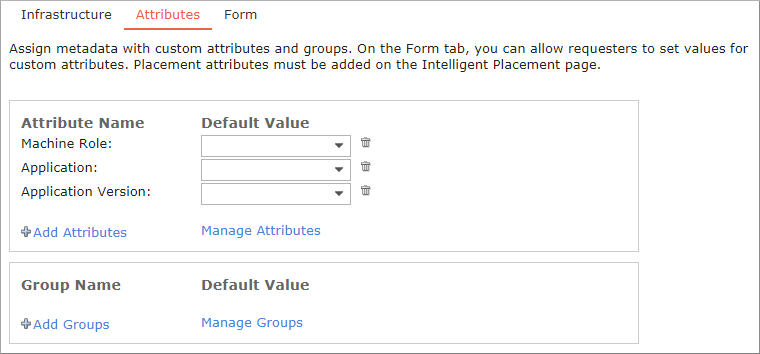
- On the Component Blueprints page, go to the Attributes tab, and click Add Attributes.
- In the Add Attributes dialog, enable the three custom attributes created above, and click OK.
Commander automatically places the attributes in the correct order, from parent to child to grandchild.
You can select default values for one or more of the attributes. However, for this example no defaults are set.
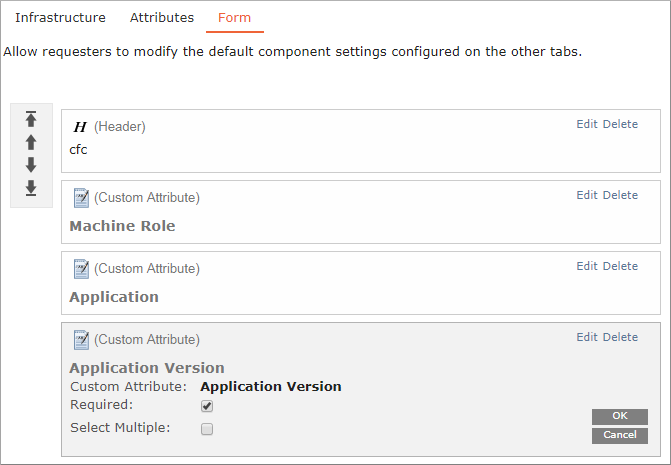
- Click the Form tab of the blueprint.
- In the Toolbox, under Attributes, click all three attributes to add them to the form.
Use the up and down buttons to position them in a logical order.
- To force requesters to select a value for each attribute, click Edit, select Required, and click OK.
- Click Finish.
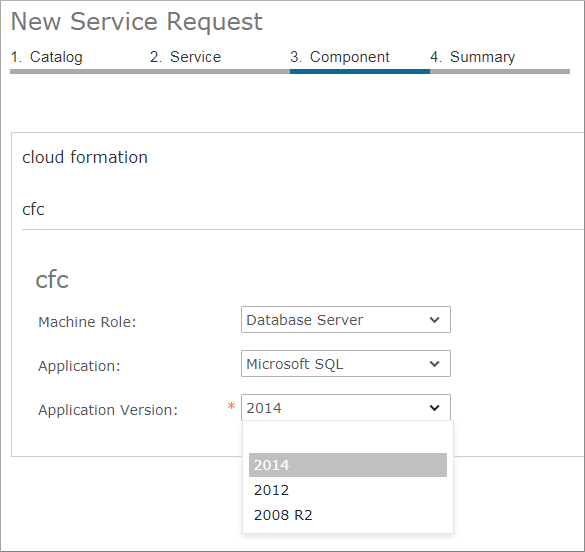
Test the service request form
Now, when a user requests a service, the component section of the form shows the three attributes. Selecting a Machine Role limits the selectable values for Application, and selecting an Application limits the selectable values for Application Version. The example below shows a request made through the Service Portal.
