Walk-Through: Configuring Organizations
This topic walks through the creation of two organizations in an enterprise lab management environment, each with its own customized cloud automation configuration.
See also the following topics:
- Using Commander in Multi-Tenant Environments — Provides a high-level view of this process.
- Create Organizations — Provides more detail on creating organizations.
In this walk-through, service catalog entries and the request approval process are assigned to organizations, but automated deployment destinations are assigned to specific users. There is no set "best practice" in this area. Your team structure and the layout of your virtual infrastructure will determine how assets are exposed to users. This walk-through highlights Commander flexibility in handling varying multi-tenant requirements.
In the real world, you will likely deploy services directly under a single cluster shared between multiple organizations, with a folder per organization. You may also rely on VM naming and other Commander metadata to determine who owns a resource. In our example, to show the flexibility of the Commander multi-tenant model, each developer has their own resource pool and folder on multiple cloud accounts, and each tester has their own cluster.
About the organizations in this example
The consumers in this example are the Development and Product Verification groups in a software development company. The groups exist in Active Directory as Development (dev@delta.pv) and Verification (verification@delta.pv). Brian is the manager of the Development group, and Mark manages the Verification group. Brian and Mark both report to Janet, the Director of Engineering. Scott is the IT Admin for both organizations.
Create a custom Service Portal role for the Director of Engineering
The default Service Portal roles work well for these groups, with one exception — Janet requires a custom role. Janet needs to be a member of both organizations, so she can sign in to the Service Portal to monitor quota usage and approve requests that exceed quota for each organization. She needs a read-only role, but also needs permission to view all services assigned to each organization, and to approve service requests for the organization.
Go to Configuration > Identity and Access > Service Portal Roles to create a custom role called Request Approver with all of the read-only permissions, plus:
- Show All Organization Services
- Request New Service
- Request Service Change
- Approve Requests
Note that because organizations provide data segregation, only organization members can access organization assets (service catalog entries, request forms, workflows, deployment destinations and quota usage information).
In this scenario, because the requesters are organization members, Janet must also be an organization member, so that she can see service requests from organization members. For more information, see Customize Service Portal Roles for Users.
Create organizations
Now you're ready to configure the organizations. Commander allows you to create the organization, add users to it, assign organizational roles to users, and set quotas all in one wizard.
Access: | Configuration > Identity and Access > Organizations tab |
Available to: | Commander Roles of Superuser and Enterprise Admin |
Go to Configuration > Identity and Access, then click the Organization tab to create the "Development" organization.
Add the AD group dev@delta.pv as an organization member with the Customer role. This allows you to assign production VMs to the group account, so that they count towards the organization's quota, not the members' quota.
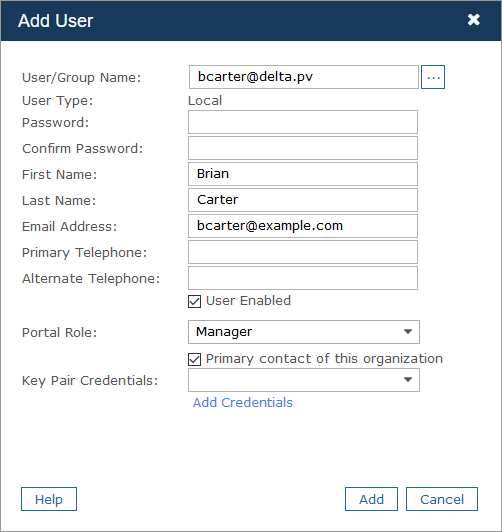
Add Brian, assigning him the Manager role, and make Brian the primary contact for the organization.
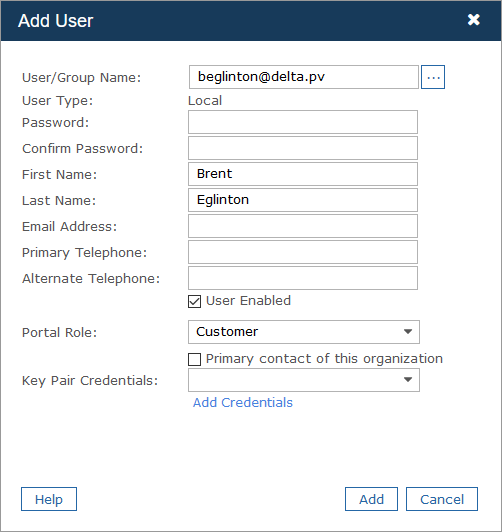
Also, add each of Brian's direct reports, assigning them the Customer role.
Adding group members individually (in addition to adding their AD group) ensures that you can assign individual member quotas. If you don't add members individually, you can still set a quota for the entire organization.
Lastly, add Janet to the organization, giving her the new Request Approver role.
Click Next until you get to the Quotas page. On the Quotas page, select Global Quota. Note that you can also set a quota for each deployment destination that this organization can deploy to, but for the purposes of this walk-through, we'll set a global quota.
Users in a Service Portal role with Manage Organization permission can manage this organization by adding and editing user's quotas for this organization. When managing quotas, they’ll see the currency selected for the organization. All Service Portal users will see Quota Usage on the Dashboard and quota warnings in their preferred currency.
On the Organization Quotas page, choose Resource Quota and set limits for CPU, Memory and Storage.
On the Member Quotas page, don't do anything, because you want to let Brian set quotas for Development members.
Now create the Verification organization in the same way:
- Add the AD group
verification@delta.pvas an organization member with the Customer role. - Mark is assigned the Manager role and is primary contact for the organization.
- All of Mark's direct reports are added, with the Customer role.
- Add Janet to this organization as well, giving her the Request Approver role.
- Choose a Resource quota, specifying different limits for Verification.
- Again, on the Member Quotas page, we don't do anything, because we want to let Mark set quotas for Verification members.
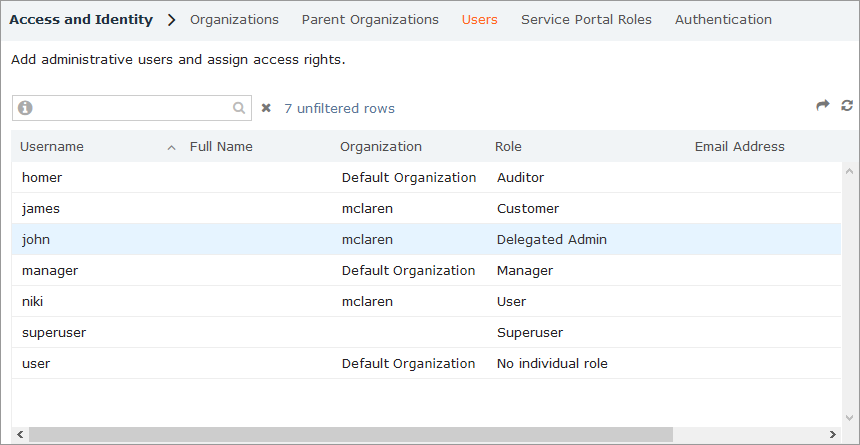
Here's a look at the list of users on the Users tab.
- For more information, see Create Organizations.
- For more information, see Set Organization Quotas.
Organization managers assign quotas to members
The Manager role provides Service Portal users with Organization Management permissions. Therefore, Brian and Mark can now sign in to the Service Portal to assign member quotas. Users in a Service Portal role with Manage Organization permission can manage this organization by adding and editing user's quotas for this organization. When managing quotas, they’ll see the currency selected for the organization. All Service Portal users will see Quota Usage on the Dashboard and quota warnings in their preferred currency.
On the Users and Quotas page in the Service Portal, they have several options: they can balance quotas across all members; they can leave all members at Max Quota, in which case quota is assigned to members on a first-come, first-served basis; or they can assign specific quotas to some or all members.
For more information, see Manage Organization Quotas in the Service Portal User Guide.
Assign service catalog entries
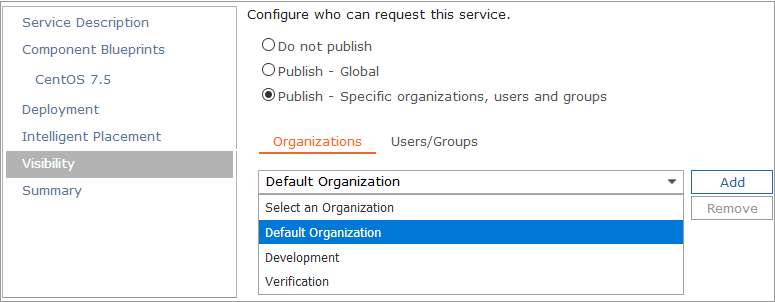
Now assign service catalog entries to each organization by going to Configuration > Self-Service > Service Catalog, editing a service and going to the Visibility page:
- For more information on configuring the service catalog, see Catalog.
Configure deployment destinations
Commander allows you to provide certain users with a choice over where they deploy, while restricting others.
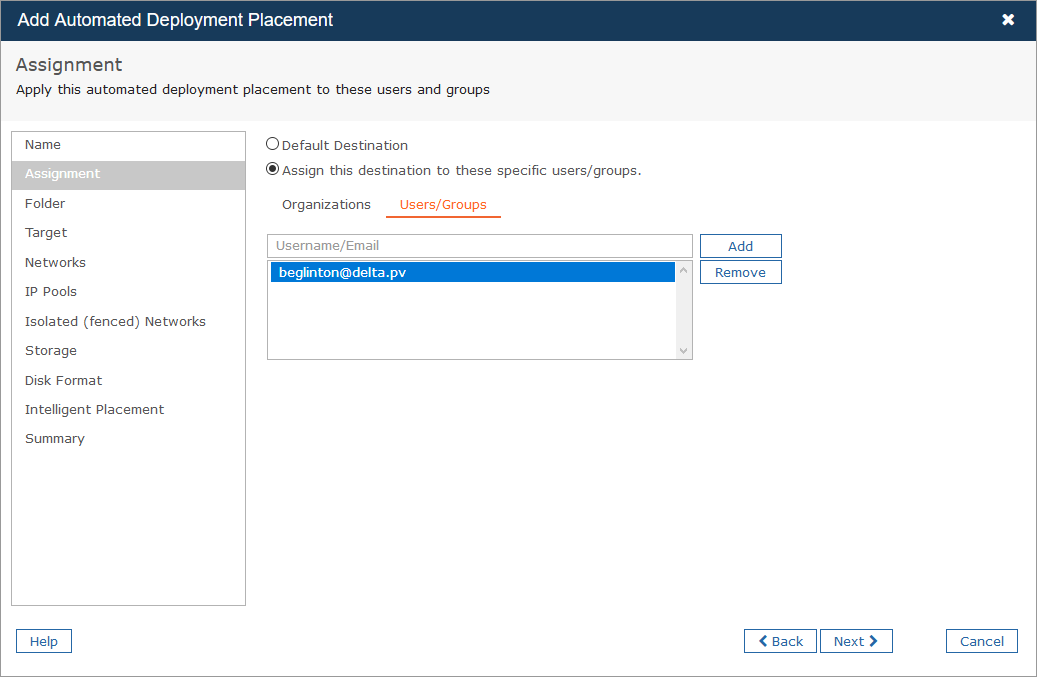
Go to Configuration > Self-Service > Provisioning to create user-specific deployment destinations for each member of Development and Verification on each cloud account, pointing to their personal folder/resource pool.
In the real world, deployment destinations would be configured per organization, not per user. This example is for illustrative purposes only, to show the flexibility of the Commander multi-tenant model.
- On the Folder page, choose the user's personal folder
- On the Target page, choose the user's personal resource pool
To allow Brian to place VMs in his organization's folder, you must create a deployment destination for Development for each cloud account, and assign all of these destinations to Brian. We choose the Development's folder and resource pool.
We do the same for Verification, assigning all of the destinations to Mark, choosing Verification's folder and resource pool.
Assign service request forms
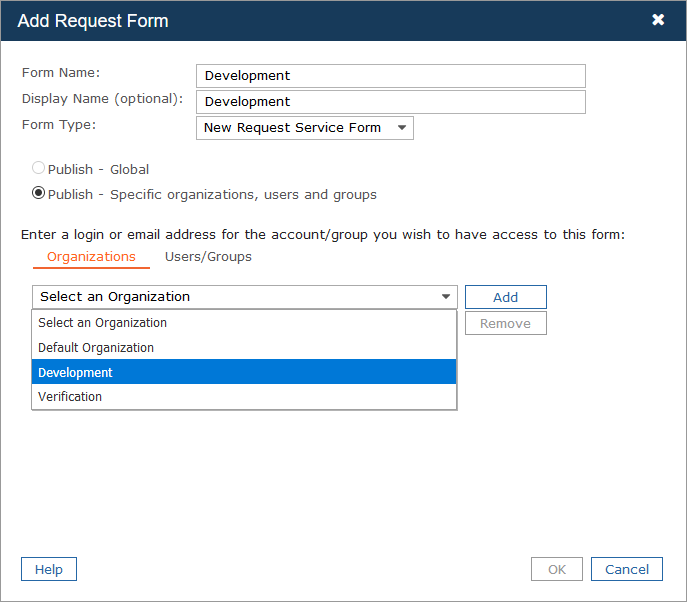
Go to Configuration > Self-Service > Form Designer to create New Service and Change Request forms for each organization.
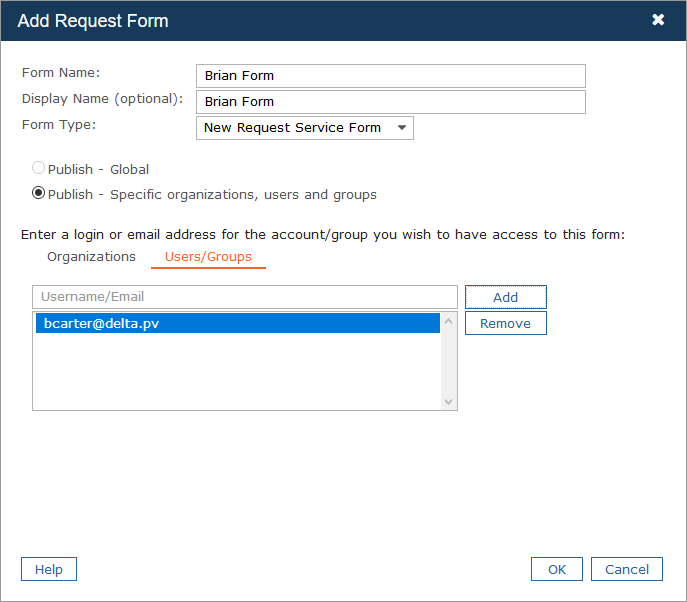
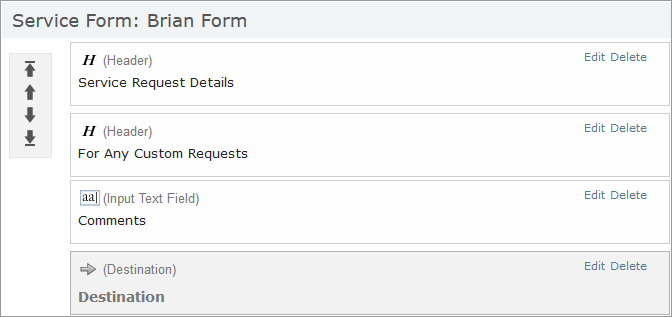
You must also create special forms for Brian and Mark. Because a user assignment always takes precedence over an organization assignment, Brian and Mark will always see this special form.
Include the Deployment Destination control, to take advantage of the organization-level deployment destinations we configured in the previous step.
Configure a quota-based request approval process
Through a variable that returns the email address for the primary contacts in each organization, you can easily create a single approval workflow for new service requests that can be shared by both organizations.
Go to Configuration > Self-Service > Approval to create an approval workflow for new service requests. In the first step, you want to send an approval email to the primary contacts in the organization when a service request will exceed a member's quota. This means that Brian and Mark can decide whether to approve these requests.
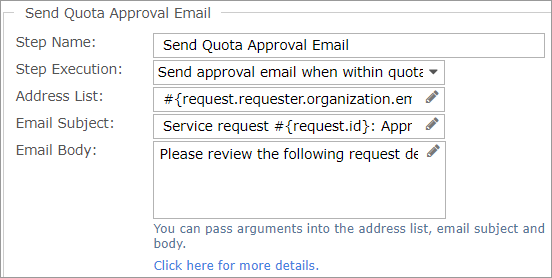
We add a Quota Approval step, specifying that you want to send an approval email when user quota is exceeded, and we enter #{request.requester.organization.email} in the Address List field to send an email to the organization's primary contact:
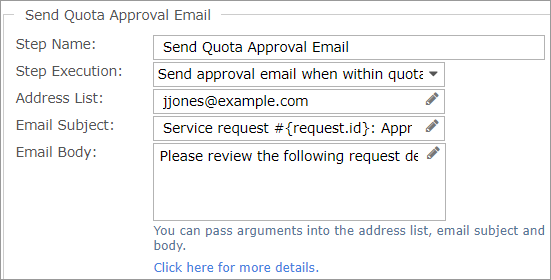
In the next step, you want higher-level approval when a service request will exceed the organization's quota, so you'll send an approval email to Janet.
Finally, on the Automation Options page, enable automated deployment for approved service requests.
Assign VM ownership and visibility
To ensure that each VM is visible to the right users, you must assign owners and make the VM visible to the right organization.
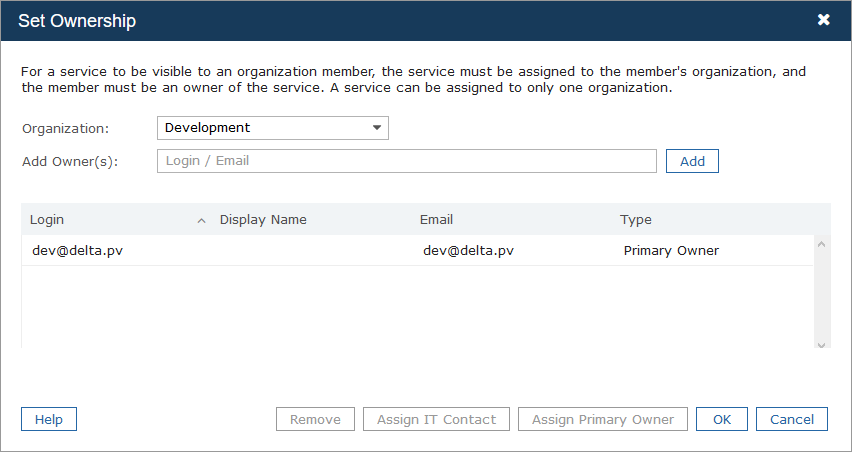
For all VMs used in production by both Development and Verification, right-click the VM in the tree and select Lifecycle Management > Set Ownership. Add dev@delta.pv or verification@delta.pv as an owner (this means the VMs count towards the organization's quota, not the user's member quota).
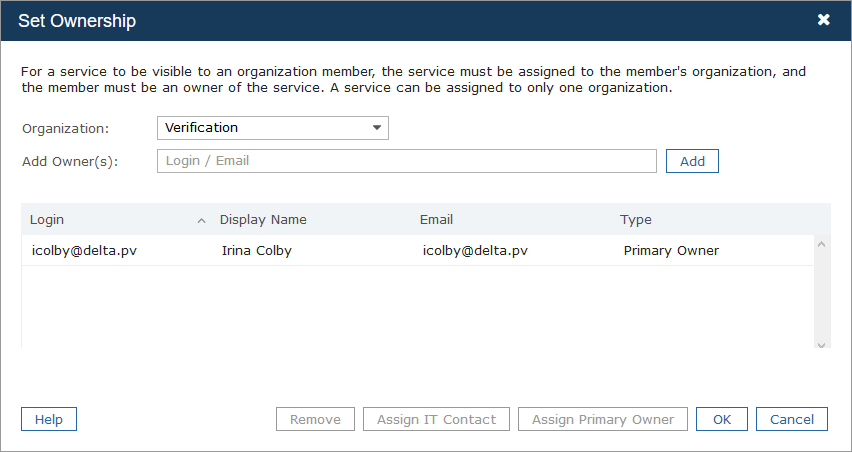
Whenever you add an organization member as owner to a VM where an organization was not already assigned, Commander automatically selects the member's organization.
You must also add Scott as an IT contact (so that he can sign in to the production VMs to fix problems).
For each "personal" VM used by members of Development and Verification, we assign the member as primary owner (this means that personal VMs count towards a user's member quota, as well as to the organization's quota). Again, Commander automatically selects the member's organization.
Configure Default Ownership policies
To ensure that new VMs are always assigned to owners and organizations, go to Configuration > Policies to set up two Default Ownership policies.
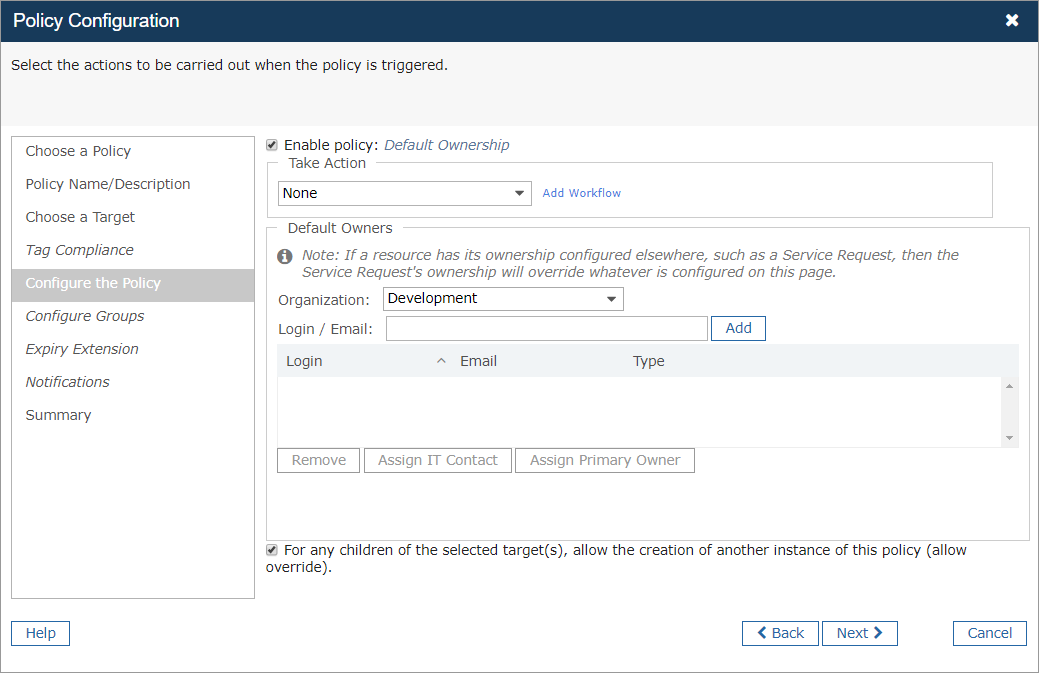
As shown below, the first policy makes the VM visible to the appropriate organization. On the Choose a Target page, select a target that's as close as possible to the root of the infrastructure tree. Then select the organization on the Configure the Policy page. By default, the option to allow this policy to be overridden for children of the selected targets is enabled.
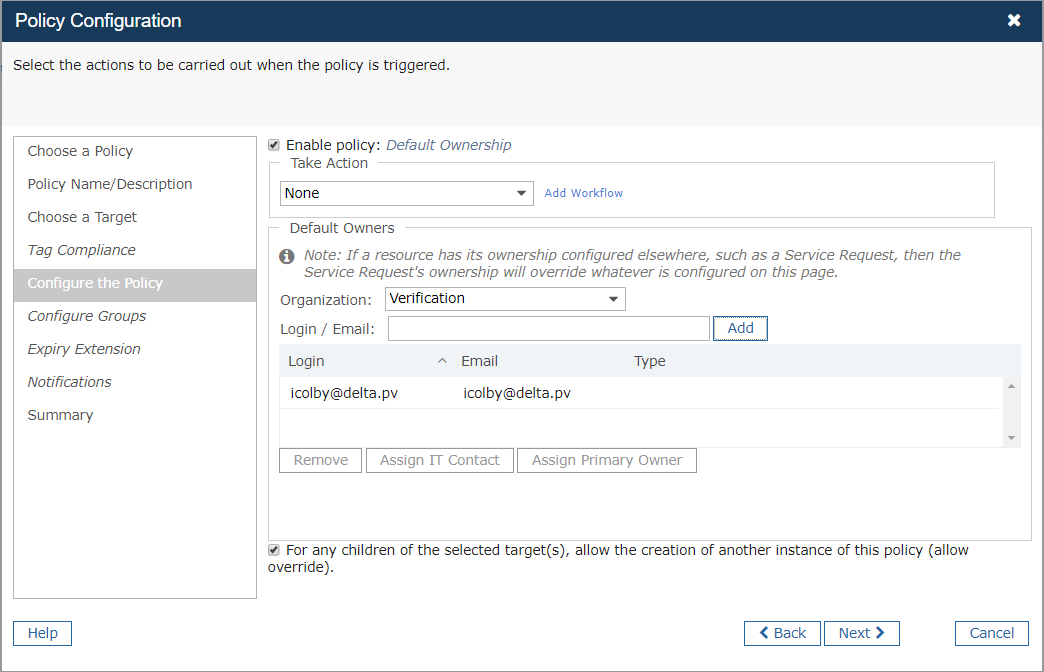
As shown below, the second policy overrides the above policy for VMs in each member's personal resource pool, with a policy that makes the VM visible to the right organization. In addition, the second policy also assigns the member as primary owner. On the Choose a Target page, select the user's resource pool. On the Configure the Policy page, add the member as primary owner. Commander automatically selects the member's organization.
To learn how to configure the ownership policy, see Set Resource Ownership with Policies.
